Today I started a new painting of a falcon. I wanted it to be a portrait but I also wanted it to have a weathered, textural feel to it. Something like what you would imagine you might find in a 18
th century explorers journal.
As I coated the the board with the background color I realized this would be a good piece to show the how the dry brush technique is different to the more common wet techniques and to some extent how they might be combined.
The background itself is a combination of dry brush, wet washes of paint and the spattering of water on to the dried paint below. The base coating of paint was a relatively wet wash of Vandyke brown paint with a medium sized flat brush. When that was dry I came back with the same brush with all most all of the water squeezed from it, leaving just enough to allow the paint to flow off the brush and on to the board. If your brush is to wet it will loosen the layer underneath causing the new and old paint to bleed together. Or worse causing the layer beneath to "lift" leaving a hole in your painting allowing the paper or board to show through.
Because I wanted a rough textural background I alternated between long and short strokes in a random pattern using the Vandyke brown and Payne's grey. When this layer was dry I flicked water onto the surface and waited a minute or two letting the drops of water begin to lift the paint of the top most layer. I then took a dry flat brush and brushed over the drops of water soaking them up and distorting them at the same time. I applied one more spattering a water and blotted them off with a paper towel. Below is a sample area of the painting.You can see the both the streaked brush strokes and the spots lifted out by the water.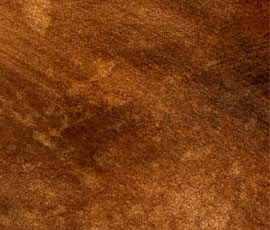
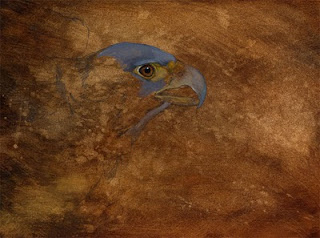
Here you can see where I have started to layer in the falcon. Now I am using relatively small round brushes again just wet enough to let the paint follow. As the work progresses I will post some detailed shots of the layering process.


